A complete valve job
A complete valve job involves new valve guides, new valves appropriately sized to the valve seat, and conditioned or new valve seats. This basic view applies to all gasoline automobile engines. Below is this work as I did it on my 1913 Silver Ghost - which has some differences but same principles apply.
A Silver Ghost does not have a separate head. The valves are located in the blocks themselves, and are thus services while still in the car (unless engine is removed). Valve seats are not removable and thus not replaceable - they are cut directly into the cast iron of the blocks.
There are two methods in use to machine the valves and seats properly:
1.) Grinding - this is the time tested and traditional technique. It involves grinding of the valves and seat with an appropriate stone. The major advantage of this method is very good control over the amount of material removed - as little as 1 ten thousandth of an inch of needed, and an excellent finish that requires little final lapping. The disadvantage os the cost of the equipment - around $10 000 complete.
2.) Carbide cutters - these have become very popular. They are easy to use and quite inexpensive - less than $700 complete, and very portable. The disadvantage to this system is that a cutter, in order to remove material, must dig in to the material in order to start the cut. This results in some unevenness (chatter) of the final surface, and less control over the amount of material removed. However, in experienced hands, they are excellent tools.
My approach is to use grinding in the workshop, but carry a carbide setup on tour.
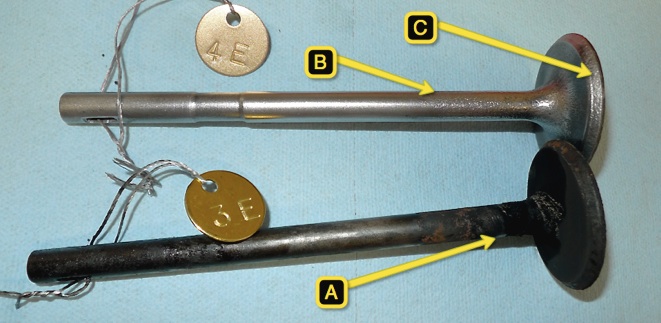
Below are two valves removed from the car. Heavy carbon deposits are noted on the neck (A) as well as on the valve face. A similar valve, cleaned by bead blasting shows the underlying damage. Heavy pitting of the stem (B) in the area in which it rides in the valve guide, as well as on the face of the valve (C) where it makes contact with the valve seat. The extent of the damage to these valves suggest replacement rather than reconditioning, although if there were no choice they certainly could be used for a while.
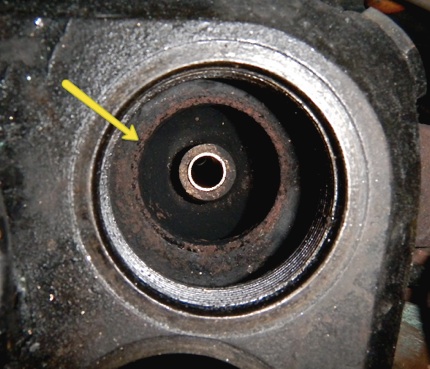
The picture at left is with the valve cover removed, looking down at the valve seat and valve guide.
The valve guide is seen as the small, shiny tube - it is centered in position in the block. This very narrow amount of the block that surrounds the valve guide is hollow - it is part of the water jacket. Due to the very thin amount of material here, removal of the guides is risky and may result in cracking the block.
The valve seat (arrowed) is seen to be covered with carbon and corrosive product. Below the valve seat is the chamber leading to the exhaust manifold.